Grafana Alerting
This article illustrates a breif introdcutions on how to setup a simplest alert in grafana.
1. What is alerting and How it works
Grafana Alerting allows you to learn about problems in your systems moments after they occur.

- Alert rules: Set evaluation criteria that determines whether an alert instance will fire.
- Labels: Match an alert rule and its instances to notification policies and silences. They can also be used to group your alerts by severity.
- Notification policies: Set where, when, and how the alerts get routed.
- Contact points: Define how your contacts are notified when an alert fires.
2. How To Set Up An Alter
-
Go to Grafana index page find the alert tab on the left side and click it
-
Create a new alert rule
-
Click "+ New alert rule"
-
Follow the steps to customize the alert
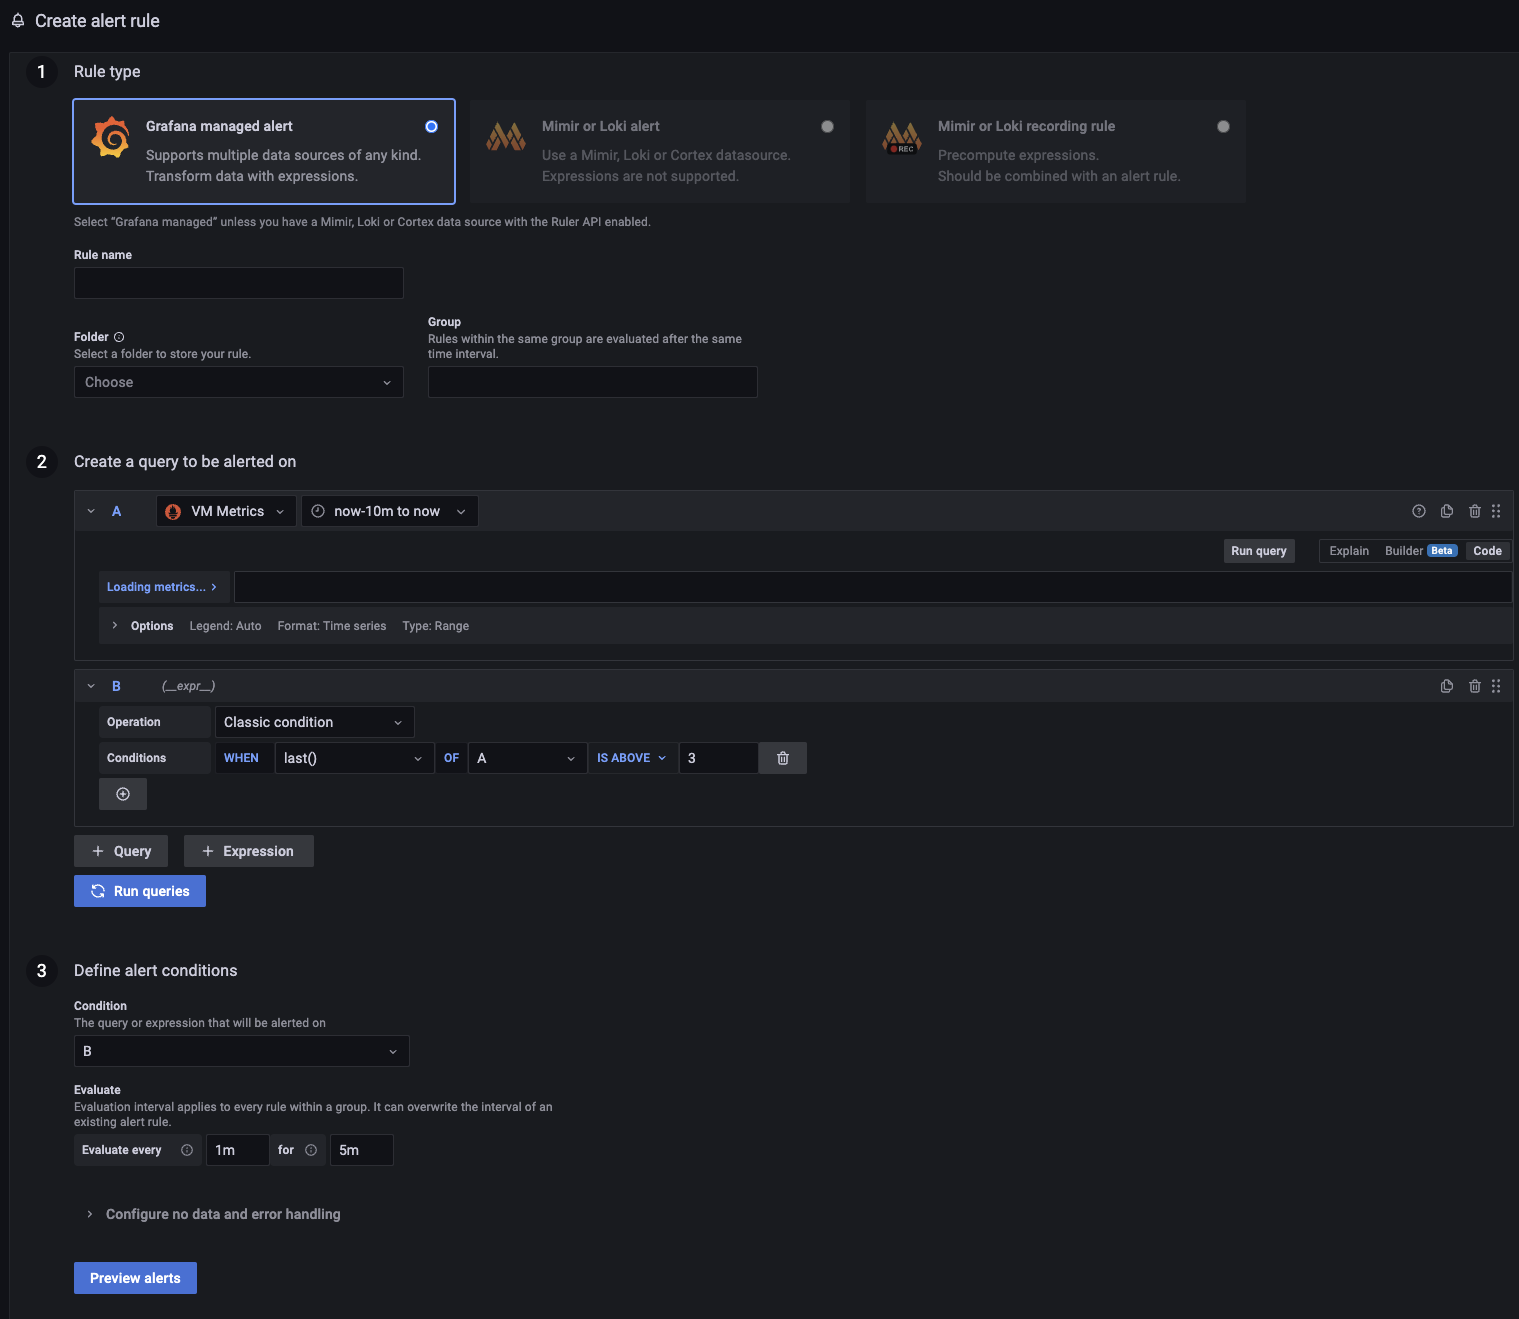
- In rule type, choose one type and fill in the Rule name and it's group. Do not forget to select a folder for your rule. It usually stores in same folder of related topic dashboard.
-
Crearte a query to be alerted on. * Choose the right data source and fill in the query to get the data. Expressions are usually used here, e.g. Math(comparasion) * Run queries button helps you to verify you are getting the right data response.
- Define alert conditions. Choose which condition you finally used for measurement and how to evaluate.(Here you can preview your alerts)
- In the last step, you are allow to add addtional details of your alter.
-
Do not forget to "Save".
-
-
Create contact points if there is no one before
-
Create new contact points
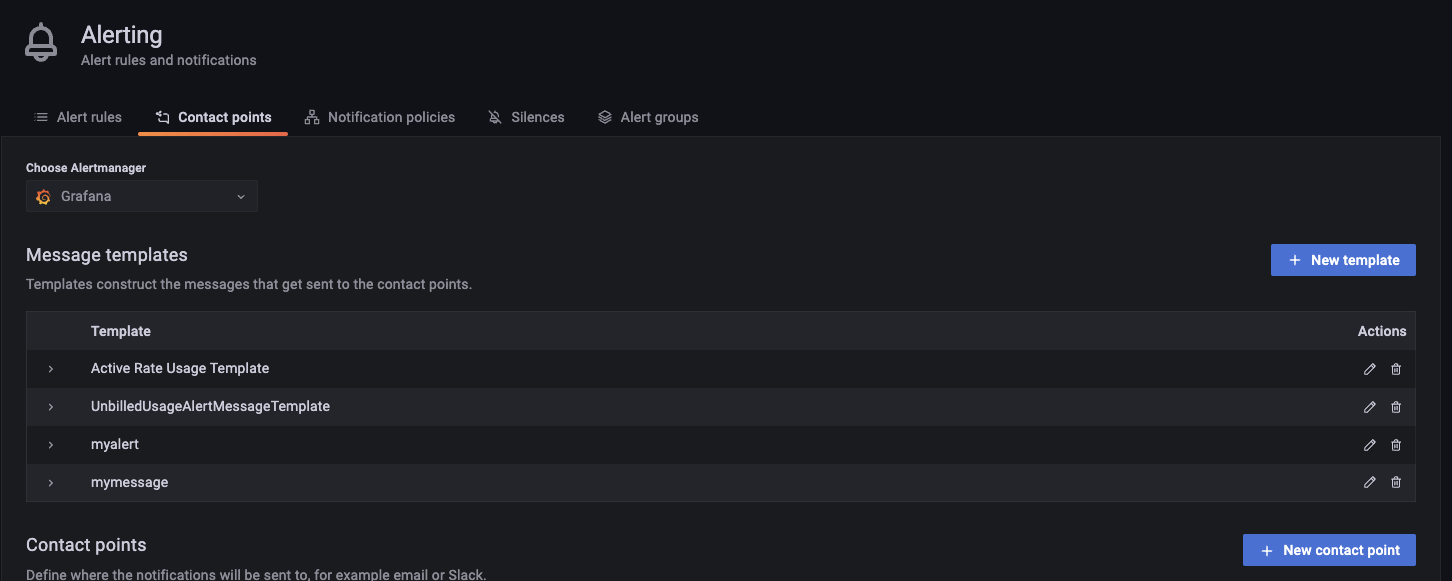
-
Name the contact points name such as "XXX Alert Contact Group"
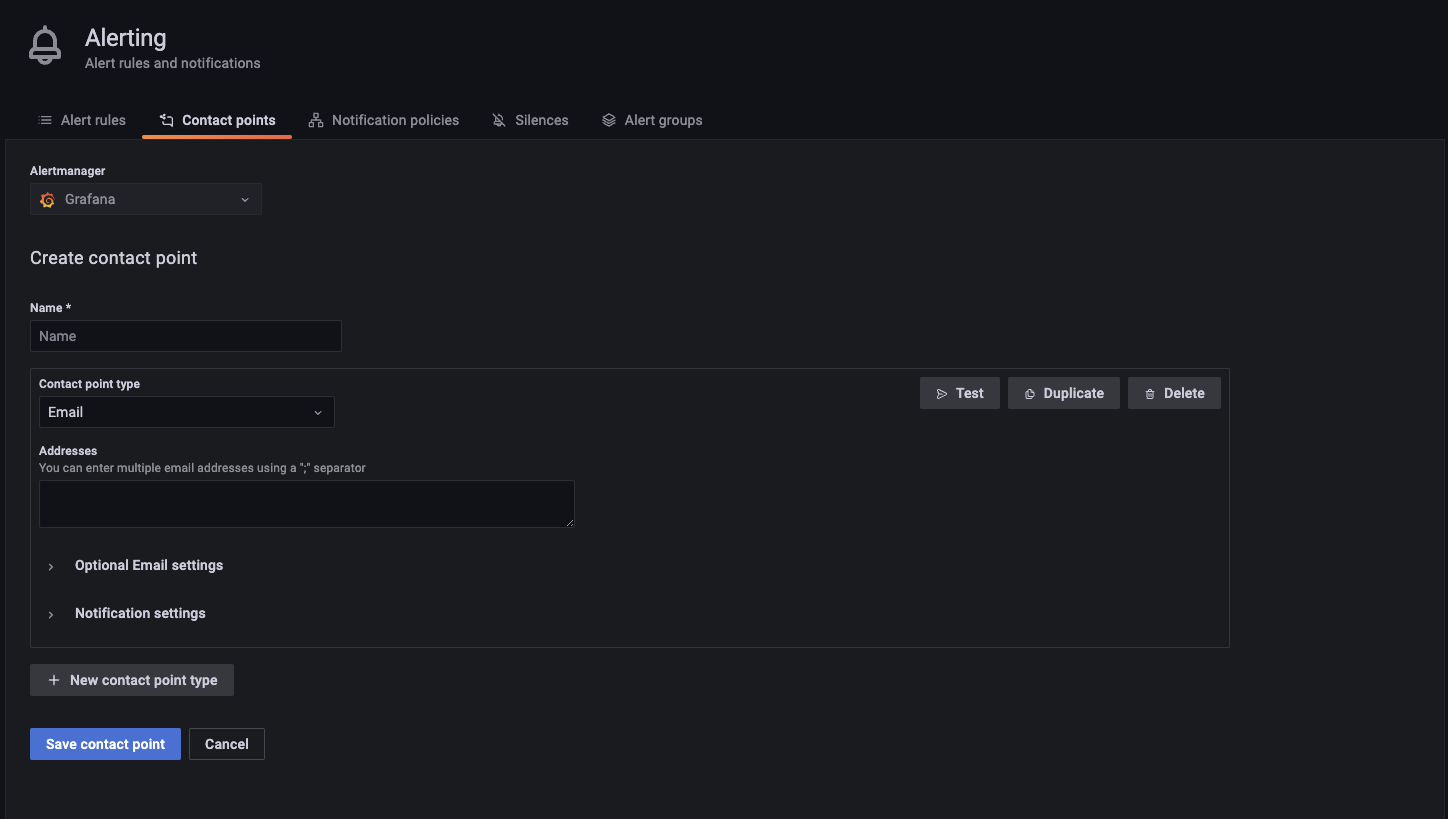
-
Choose a contact group point such as email, slack or other apps and defien the addreses for eaample for email. (Here you can send a test message to see if receives can receive the alters by just click "Test")
-
Do no forget to Save.
-
-
Define alterting polices
-
Switch to the Notification policies tab to create a new policy.
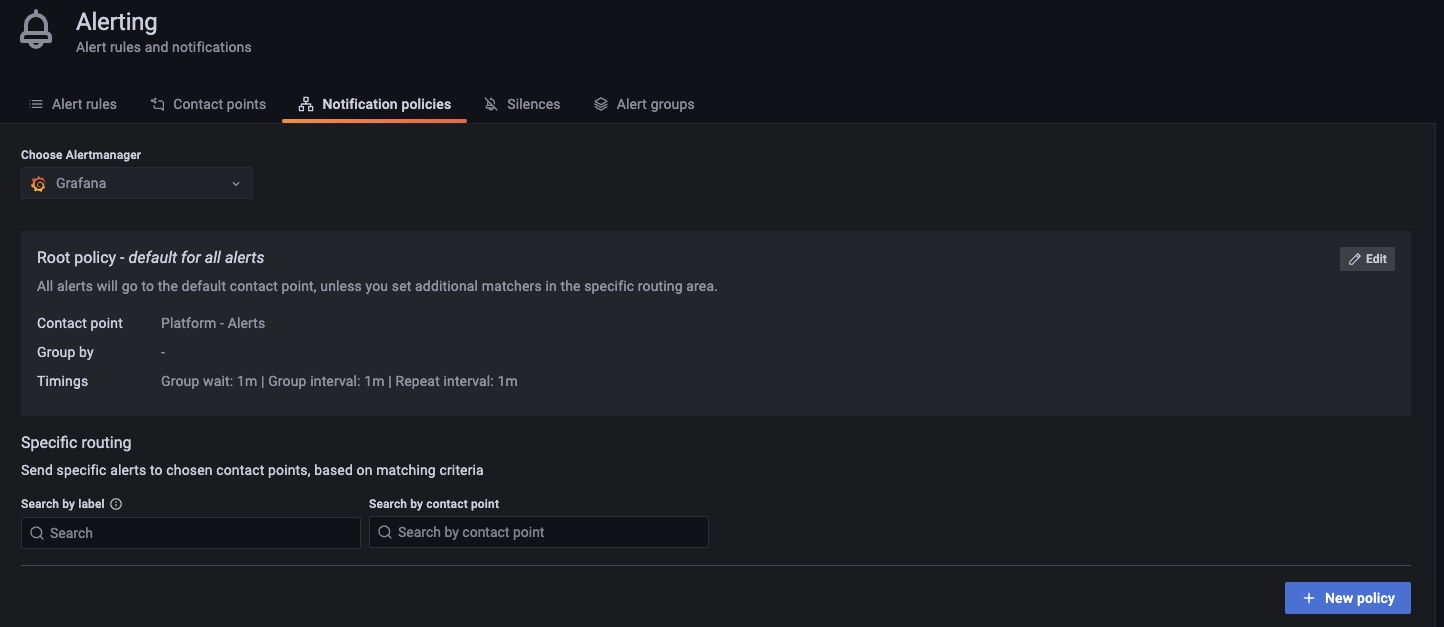
-
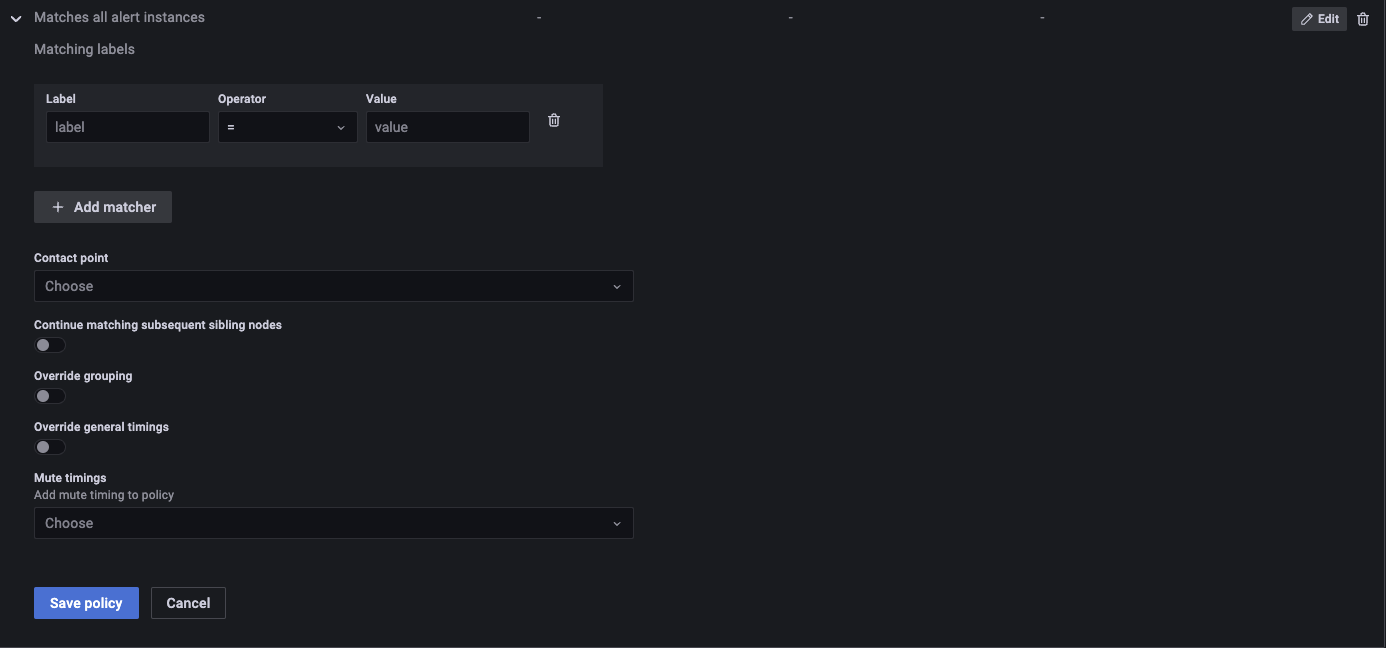
Click add matcher, this will select a alert rule. For instance, you could define lebel value as "alertname " and operaor as "=" and value is alert you just defined.
-
Select the page duty contact in contact points.
-
Do not forget to "SAVE".
-
-
Your alert should be well set up now.
3. Verify your alert works
-
Test on setting up
When setting up the contact points, you have a chance to send pre-defined or self-defined format of alterings to the target people. Please test to ensure they could correctelly receive the alters.
-
Modify the alerting rule for verification
Once you have set up a rules and wants to verify if it works, you may want to change the threshold to fire the alarm to see if other parts of your rules works well.
4. Keep eyes open
No matter the alerts are sent via slack channels or email or phone, take imediate action when you are notified to avoid possible loss.